Wednesday, December 31, 2008

Always have a camera with you

I love this photo. It had just snowed in Reno and Tahoe was getting tons of snow too. My goal in this road trip was to take a great photo of Tahoe. But living in New York I just missed the big mountains and the outdoors. Everything was so beautiful on my drive I was so happy to be driving. Even though we were in ski resort traffic. I was stopped waiting for traffic, and I looked up and just loved what I was looking at. I love the contrast of the blinding white snow, the dark green trees, the brilliant blue sky, so I snapped a photo, right from my car. The point of this is that even though I was on my way to take some photos I wasn't expecting this one, and it turned out to be the best of the whole day.

You never know when you'll have an opportunity to take a great photo.

Always take a camera wherever you go.
Mount Rose Trees

Monday, December 29, 2008

Mount Rose

This was the scenery outside my parents house. This is Mount Rose. The next day it was a blanket of snow. I love Reno.
Mount Rose

Wednesday, December 24, 2008

Taking photos at just the right moment

Today I was jumping on the trampoline with my daughter, niece and nephew while my mom took pictures with my camera. She was trying to take the photo while they were in the air but the camera kept taking taking the picture too late. The photos turned out kind of boring. Nothing was really happening. The moment was lost because of the delay of the camera.
Trampoline timing-2

All point-and-shoot cameras have to get focused and get the exposure therefore it takes a moment for the camera to actually capture an image. But often we need the photo at exactly the right moment, right when we push the shutter button. But the shutter opens a split-second later, too late.

Here is the trick. Hold the shutter button half-way down. The camera will get focused and set the exposure. Then when you press the button all-the-way down the shutter will open immediately. This makes it easier to take the photo at just the right moment. My mom caught some great moments.
Trampoline timing-3

Trampoline timing-4

Trampoline timing-5

Try it during the holidays.
1. Push the button half-way down to focus on the subject
2. Wait for the right moment, push the button all the way down

Monday, December 22, 2008

Driving to Reno, Shooting in P

It has been so long since I've been on a good road trip I was really enjoying our drive from Sacramento, CA to Reno, NV. Donner Pass had some recent snow and was looking beautiful.

drive-donner-pass

Please do not take photos while driving. I am a bad example.

I like this photo because the sides of the photo look blurry, while the middle of the photo is sharp. There really wasn't any trick to this but the blurry parts were passing the edges of the frame. The scene directly in front of us wasn't changing as fast so it looks more in-focus. If I was going twice as fast it would be more blurry on the edges.

I shoot in P mode most of the time. It basically does everything automatic but I'm able to do some manual adjustments (Auto mode in most cameras doesn't allow manual adjustments)

Camera Dial

Wednesday, December 17, 2008

Get rid of red eyes in photos

Red-eye-reduction is a setting that creates a double flash or blinking flash right before taking the real photo. The red in the photo is actually the back of the eyeball reflecting that flash back to the camera.

I hate red-eye-reduction.

For a couple of reasons...

1. It doesn't always work
What happens is all the extra flashes from your camera are meant to make the human iris close smaller, reducing the reflection from the back of the eyeball back to your camera. Or in some cameras the flash that precedes the photo, detects the red, then tries to fix it digitally. Some do ok.

2. It wastes battery
All those extra flashes are taking a toll on your battery

3. It takes to long to take the photo
After waiting for all the extra flashes the moment is lost. Oh well, try again next time, then the flashes take to long again.

So, turn off red-eye-reduction. Every camera that has red-eye-reduction, can turn it off. Read your manual, and it will tell you how to disable it.

Two Tips

1. Don't use a flash.
Just to reiterate, the red-eye comes from the reflection of the camera flash off the back of the eyeball.

Or if you must use a flash

2 . Have your subject look anywhere but directly at the camera.
This will not allow the reflection from the back of the eyeball to reach the camera.

Monday, December 15, 2008

How to buy a camera

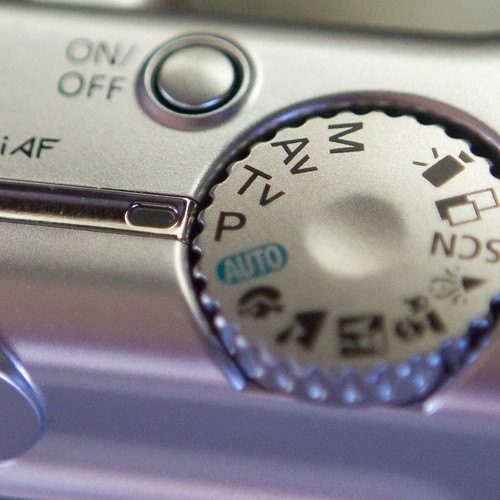
My Aunt Liza just bought a camera. A Nikon D90. A great choice, for her, though not for everyone. The reason it was a good choice for her was that she had done her research and knew what she wanted. She sent me a list of cameras that she was thinking about at varying cost. It was obvious from our conversation that she really wanted the D90, it had everything she wanted and by looking at her other choices on the list. I knew that she was very interested in photography and moving up to a more deluxe model. She was however hesitant based on the price, but I know she'll love it.


photo credit: Miriam Lovell

My goal is not to pick out the best features for you and your camera but offer a decision making process.

Buying a camera can be daunting if you have a limited budget. Especially when there are probably more cameras on the market than there are dollars in your budget to buy one.

The biggest problem when buying a camera: not knowing what you want.

So here is my advice.

1. Decide on features first
Set aside the price, for a moment, then write down all the features you want. If you can't think of very many that's fine. If you need a zoom lens because you love to photograph wildlife, write it down. If you have kids and you want something that will do video as well as photos, write it down.

2. Make a list of cameras with those features
Find a camera and brand that you are satisfied has all the features you want. If you need help I like to use the the feature search from dpreview.com. The dpreview.com list is more technical in nature, and I recommend it for those reasons. If you can translate your needs into technical features, go there.

Make a list up to about four cameras, that have these features. Rank them based on how cool it looks or size that have all the features you want.

3. You should buy the camera at the top of your list
Plain and simple. But, this isn't always feasible. You may want a $4,000 camera, but only have $200. Point-and-shoot cameras still have shutters, sensors and lenses, you'll just have to scale back the quality until you can afford it that expensive dream camera.

4. Find the best deal on that camera
Shop around.

If you follow these steps you can take all that emotion out of trying to figure out if you are getting the best features for the best deal. Because you already know what you want.

Monday, December 8, 2008

Improve the color of your photos with white balance

All light has different color temperatures. Although we can't see it, digital cameras can.

For example: most indoor lighting has a color temperature of around 3200 degrees Kelvin, and outdoor lighting has a color temperature of around 5600 degrees Kelvin. I'm not going to explain Kelvin, but you just need to understand there is a difference.

To get better color, most cameras automatically adjust to the different color temperatures, but they don't always guess the color temperature correctly.

Most point-and-shoot cameras will have basic white balance control. Some even have a custom white balance setting. Basic white balance settings will have a little icon of a cloud, a light bulb, a tree with shade etc. Use the cloud setting outside when it is cloudy, use the light bulb setting anywhere that is lit with regular incandescent bulbs... anyway you get the idea. Your camera settings will probably be close, but slightly different from mine so experiment with your white balance options and see what you can come up with. Here is what I have.

This first photo uses custom white balance, which was balanced under the hanging light in the background (probably around 3200 K or less). This accurately depicts the color of the walls etc, but the sunlight spilling in the window gives me (in the chair) a villainous pale blue hue.

indoor white balance

I'd like to think of myself more has the warm friendly superhero type so I re-balanced the custom white balance near the window and it gives my face a more accurate and warmer hue.
outdoor white balance

There problem with this photo is that I have two different light temperatures. The background light, around 3200 and the sunlight coming in the window at around 5600. My face is nice and tan but I assure you my walls are not that yellow. The simple solution is to turn off the hanging light and use only the sunlight coming in the window.

UPDATE: kelvin has been corrected above to read Kelvin. thanks Daragh

Friday, December 5, 2008

I dropped my camera three times today

I love my camera, today alone I've dropped it 3 times. It's had some pretty bad falls and just keeps going. Including a fall from a kite photography rig about 25 feet up onto a wet sandy beach. For a while it sounded like scraping sand when I turned it on. But it went away and still keeps chugging.

Monday, December 1, 2008

The number one mistake people make when taking photos

The number one mistake that I see people make is not holding the camera still. So many photos turn out blurry for this reason. Many cameras are getting blamed for bad technique by the photographer.

You may say "well duh", but if you make the conscious effort you'll notice your photos are just a little more sharp.

When the flash fires or if you have really good light you'll get some non blurry photos even if you happen to jiggle the camera but practice holding still and you'll start a good habit.

So hold your camera still, let me know if your photos improve.

This photo below had plenty of good light. If you look at the enlarged version you'll see that it isn't blurry because of bad focus. It is blurry from camera jiggle. Check it out zoomed in.

The day after Thanksgiving

Camera Jiggle

Tuesday, November 25, 2008

Read your camera manual

photomanual-1

There is no better way to improve your photography than by reading your manual and understanding your camera.

As you understand your camera and experiment with the features you're photos will naturally improve.

Thursday, November 20, 2008

Welcome to Automatic Camera

This blog is for those who don't want to spend big bucks on photo equipment to get great photos. This blog is to help you and me both learn how to take better photos with an inexpensive digital camera. I'm glad you've decided to read through this blog. I'm happy you are here.

My goal here is to make good use of my one-hundred-thirty dollar Canon a570is camera. I plan to take some great photos.

Fast Train