Tuesday, January 27, 2009

How to better use the camera you have

New York in the summer
View of Manhattan from Governor's Island. It was such a nice day then and it is so cold now.

This post is inspired by my amazing cousin Candice. She commented on a previous post and said:
Maybe all of your teaching will sink in one day. I have been trying to use it, but sometimes pictures happen so fast, that I forget about 5 good things to do for a great picture.

Maybe I should try to pick subjects that do not move.

Basically Candice represents a huge percentage of people who own cameras and want to get better at taking photos. They wish they could justify buying a really nice expensive camera but can't because the one they have already overwhelming.

My solution is to underwhelm yourself.

Here is my recommended strategy to taking control of your camera. It's a three step plan.

1 Read the manual for your camera

This was the first thing I blogged about here. You don't have to read it all right now, or even this week, just keep it with you. Read through one specific feature at a time. If you don't have your manual the manufacturer probably has a copy online. I found mine on Canon's website.

2 Practice a single feature or setting

Take a photo. Then take the same photo but change only a single setting.
This might be easier in manual mode, when you can change one setting at a time and see what kind of difference it makes. Play with the same setting in different light. If you want to take better photos of a constantly moving toddler, then take a few hundred in a sitting. I guarantee you'll get better. Just don't try to learn the whole camera in that one sitting.

3 Rinse and repeat
Take lots and lots of photos. You can't get better at playing piano just by reading about it on the internet.
Saturday, January 24, 2009

What to do with all these photos?

I'm so excited. I've been using iPhoto for years on my mac. And when people asked about what photo application they should use for their PC I always recommended Picasa. Now Picasa is available for Mac. I'm going to try it. I'll let you know how it goes.

Wednesday, January 21, 2009

From the Archives

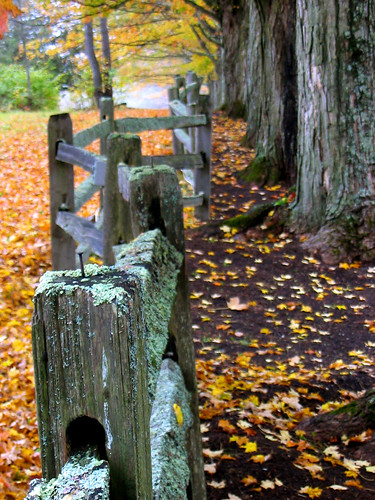
My very first digital camera was a Canon A60. It had 2 Megapixels and a 1.5 inch display. I pick it up now and its heavy and bulky. It still works just fine.

When I took this photo and was very proud of myself. I look at it now and it's merely ok, but I don't think I've improved as much as I think I have. But I wouldn't do the photo any different, except maybe try to squeeze just a little more bokeh (blurriness) into the background. I would keep the framing and the color that was there, and of course the focus of the nail on the fence post.

Vermont Fence

Monday, January 19, 2009

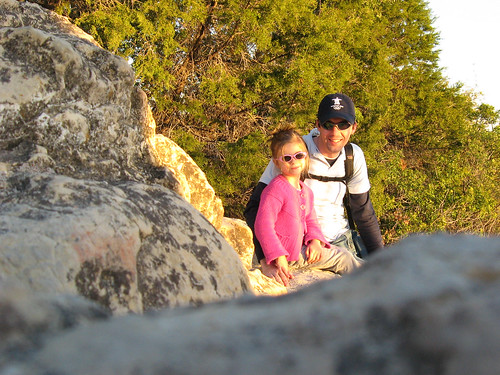
Increase the depth of your photo

Depth is added by including the foreground.

In this case the rocks were in the foreground. This worked out perfectly since I used a timer and the rocks were "in the way". So I just took the photo, but it tells the story of the rocks we climbed on.

Mount Bonnell

My daughter, Hannah, and I counted the steps up the stairs to the peak of Mt. Bonnell. There were 104 on the way up and 106 on the way down (it's a mystery!)

When we got there she kept asking me to take her picture. This one turned out the best.

Friday, January 16, 2009

Remember the Alamo!

We're out of town this week. I'm enjoying the warmer weather in Texas. Right now NYC has temperatures around 17 degrees. We were happily enjoying 65 degrees in San Antonio.

We went to see the Alamo and the Riverwalk.

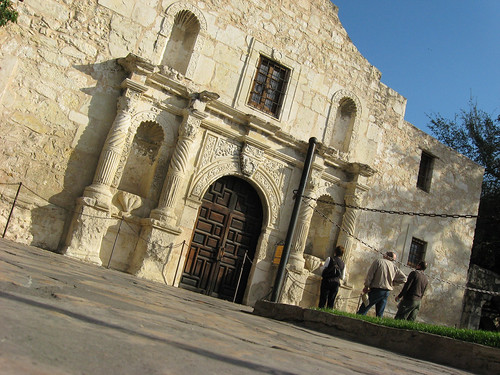
The Alamo
There are thousands of photos of the Alamo. So in order to not have the same hum-drum photo that gets taken hundreds of times a day, I changed the perspective, and tilted my camera at an angle.

I haven't altered this photo at all. This is the way it came out of the camera. Not bad for just walking up and snapping the photo.

The same thing happened with the BBQ place we ate at last night. I wanted a photo of the outside because I really liked eating there. The whole experience was really fun. You walk up order and find a table. They give you wax paper to eat on and a whole loaf of bread. We made BBQ sandwich after sandwich. So delicious.

Rudy's

I only had time to snap one photo and this is what I got. Because it was low light I had to walk over to a garbage can and put the camera there to hold it still. I even got a small part of the can in the photo. The can wasn't even so this is what I got, straight out of the camera.

Both of these photos are made slightly better just by changing the perspective and tilting the camera.

Monday, January 12, 2009

Use the "flower" setting

The "flower" setting is really called "macro" and I think it is universally symbolized as a tulip-like icon.

The point of this feature is to take photos very close to the subject. The result is a narrow depth of field and a different perspective. For my photos I was within a few inches.

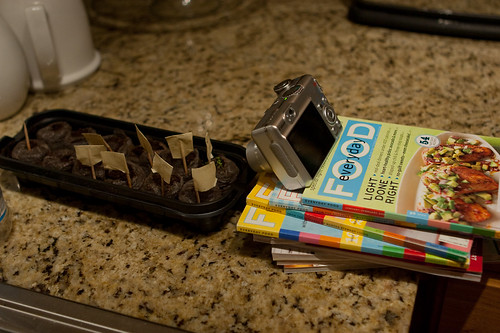
My very professional macro studio

As you can see, I don't actually have a mini tripod. Well I do, but I can't find it. But I did have a bunch of food magazines on hand.

The macro setting is one of my favorite features and one of the features you can find on pretty much any camera. I think it is the most under-used feature (along with the timer) on point-and-shoot cameras.

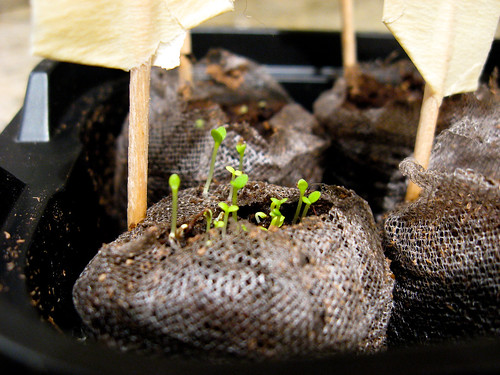
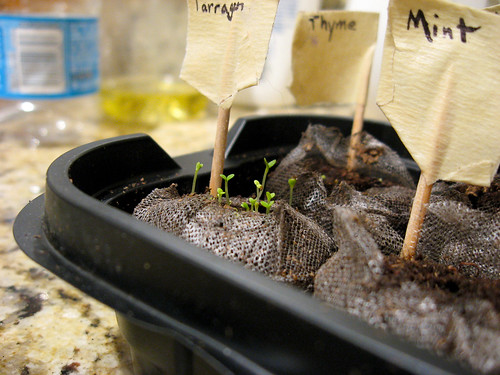
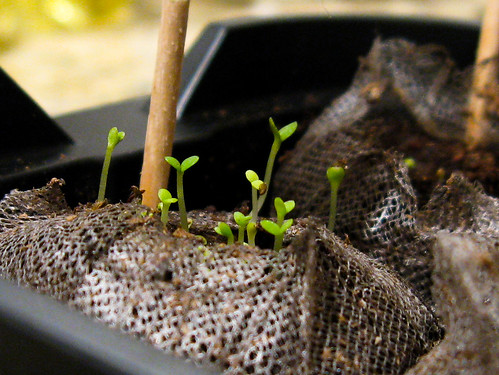
I hate how much it costs to buy some fresh herbs and so I'm starting my own herb garden. We'll soon see how green my thumb is. Tarragon was the first to sprout.

Macro Tarragon 1

I've enhanced these photos by increasing the black and upping the contrast, in Lightroom.

I like this photo below but it shows too much around the subject.
Macro Tarragon 3

So I cropped it to look like this:
Macro Tarragon 4

My process went like this.

1 Get a general idea of what the Tarragon looks like with the macro setting.

2 Get something to prop the camera on since my kitchen doesn't have great light. The shutter was open from 1/20th - 1/6th of a second depending on the photo. (The shutter was automatic so I didn't really adjust it, if I focused on the dark dirt, the camera wanted the shutter to stay open longer because it thinks it is taking a photo of something really dark)

3 Set the timer to 2 seconds (I love the timer options on my camera). Pressing the button, even on a tripod, can cause some camera shake and food magazines are not known for holding a camera perfectly still. Letting the camera wait two seconds and then open the shutter makes sure there is no camera shake.

4 Arrange the herb garden how I want it. I rotated the Tarragon to my liking.

5 Take photos.

6 Make some minor adjustments in Lightroom, crop some.

Anyone can take photos like these.

It took me about 10 minutes.

Wednesday, January 7, 2009

Opposites attract in creative photography

In my previous post this week I wrote about four ways to take professional photos with an inexpensive camera. But I have more to say on the topic.

The thing that makes something professional in a photo is also that same thing applied in opposite. If something is in focus then try to get something in frame that is out of focus. That is what makes macro shots professional.

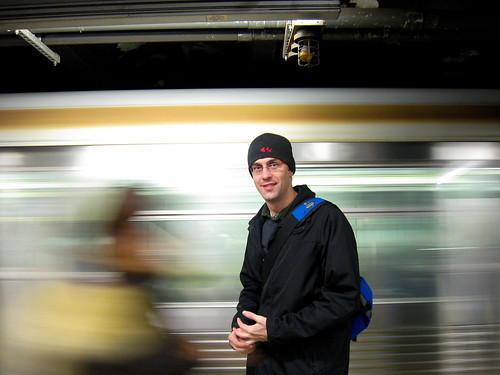
For using motion in my photo something needed to be not moving. That turned out to be myself and the ceiling which accentuates the moving train.
In the subway

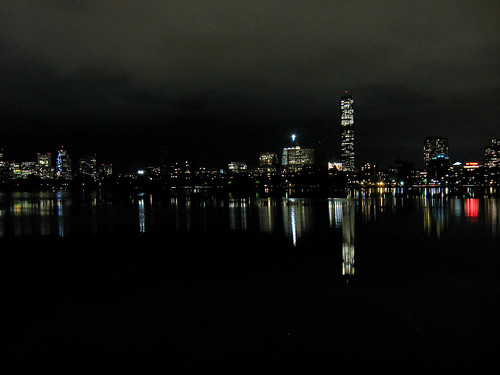
This applies more in some areas than others. For example it's hard to apply not using a tripod and using a tripod in the same photo. Although using a tripod can make a photo tack sharp. I like the night shot because the lights are in focus but the lights reflecting off the water are blurred by the rippled water.
Boston at night

As with all arts these "rules" are meant to be broken. If I think is a professional photo, someone else may not. Some photos require everything to be in focus, and so forth.

Monday, January 5, 2009

4 ways to take professional photos with your inexpensive camera

1. Use the macro setting
Using the macro is very underrated. The macro helps you get a narrow field in focus. Professionals use this narrow depth of field look all the time. The macro setting just makes it easy on point-and-shoot cameras.
Snow Macro

2. Change your perspective

One of my favorite things to do to change the perspective of my shots is to attach my camera to a kite. The camera gets a really high angle and some stunning shots. Kite aerial photography is something I'll do more of as the weather warms up.
Fort Tilden beach

3. Use a tripod
A tripod is absolutely necessary for night photos. This shutter was only 1/6 of a second. Invest in a tripod.
Boston at night

4. Show motion in your photo
It seems like so many photos are shot with low light. This makes it easy to get motion in my shots. The thing about show motion is that something must not be moving for the motion to look good.
In the subway